
We were learning about printmaking and the process of creating it, as well as contrasting colours. I would say that our teacher aimed to teach us about how the opposite colours on the wheel contrast with each other. I would say I learned a lot about how to carve this out & better techniques to get the results I want.
Steps I went through
- Making a design
- Started my first linocut printing
- Made 2 different designs
- made my final linocut printings
- Rubbed out the pencil on it
- started printmaking and getting colours that contrast with each other
- Getting the white paper to print on
- Making 8 prinks overall


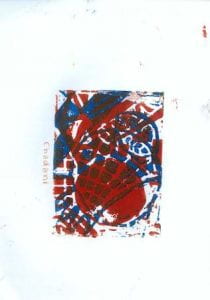


I didn’t intend any sort of meaning, but I did take inspiration from artists who did orphism-type art, such as Sonia Delaunay and Francis Picabia. My art was inspired a lot by their type of art, which is very significant, even to this day.

This is one of my planning pages where I incorporated the aspects of orphism art through circles, colours, and patterns. These pages gave me a vision of how I would overall want my linocut print to look. Also, giving me ideas on how I could add other types of designs to it. I feel that I would link the types of art we have done so far to mathematics, as it reminds me of making patterns and using a ruler. As we have to incorporate the same patterns and straight lines or curved lines, which reminds me of a graph. What I really enjoyed was the print-making part as I got to look at different contrasting colours and apply them to my print, which made a lot of nice prints. When I first did my linocut, it was quite hard to cut as I had tried other ways that I perceived would be easier, and in the end, I ended up using other techniques, which I wish I had used from the start, as it would have saved me a lot of time. There’s nothing especially I would want Whaea Rowena to know, but it could be the designs I have used from other artists that I have used & incorporated to show the knowledge I have learned overall this term.